Important
La traduction est le fruit d’un effort communautaire auquel vous pouvez vous joindre. Cette page est actuellement traduite à 70.16%.
4. Le panneau explorateur
Le panneau explorateur de QGIS est un bon moyen d’explorer, chercher, inspecter, copier et charger des ressources QGIS. Seuls les ressources que QGIS sait manipuler sont disponibles dans l’explorateur.
En utilisant le panneau Explorateur, vous pouvez localiser, inspecter et ajouter une donnée, comme décrit dans la section Le panneau Explorateur. En plus, le panneau Explorateur supporte le glisser et déplacer de nombreuses ressources QGIS, telles que les fichiers projet, les scripts Python, les scripts de traitement et les modèles de traitement.
Les scripts Python, les scripts de traitement et les modèles de traitement peuvent également être ouverts pour l’édition dans un éditeur extermine et le modeleur graphique.
You can drag and drop layers from the Layers panel to the Browser panel, for instance into a GeoPackage or a PostgreSQL database.
Fig. 4.1 Le panneau explorateur
Le panneau explorateur (Fig. 4.1) est organisé selon une hiérarchie extensible avec un niveau supérieur qui organise les ressources disponibles pour l’explorateur. Les nœuds en entrée sont développés en cliquant sur  à gauche du nom de l’entrée. Une branche se plie en cliquant sur
  . Le bouton
  Tout replier plie tout les entrées du niveau supérieur.
Dans il est possible de désactiver des ressources. Si, par exemple, vous ne souhaitez pas voir les scripts Python dans l’explorateur, vous pouvez décocher l’entrée et, si vous voulez retirer votre répertoire utilisateur de l’explorateur, vous pouvez décocher l’entrée .
Un filtre ( Filtrer l’explorateur) peut être utilisé pour effectuer une recherche sur les éléments visibles (les entrées fichier et les entrées de nœud dans la hiérarchie). En utilisant les
  Options du menu déroulement, vous pouvez
Basculer vers une recherche Sensible à la casse
Mettre la syntaxe du filtre sur
Normal
Joker(s)
Expression régulière
L outil des propriétés affichant des informations utiles sur certaines entrées / ressources, peut être activé / désactivé à l’aide du  Activer/désactiver le bouton des propriétés. Quand il est activé, cela ouvre en bas du panneau d’exploration ce que l’on peut voir ici Fig. 4.2.
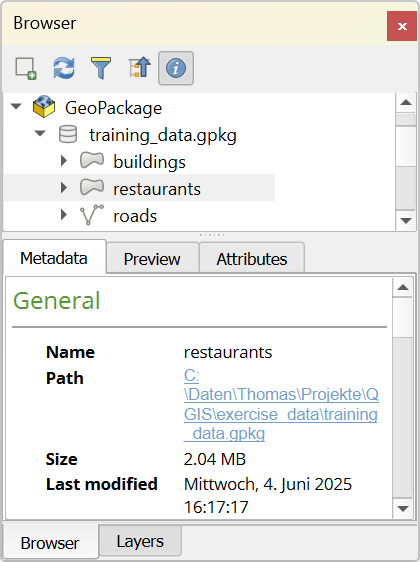
Fig. 4.2 L’outil propriétés
Un deuxième panneau explorateur peut être ouvert en activant le panneau Explorateur(2) dans . Avoir deux panneaux d’exploration peut être utile pour copier des couches entre deux ressources localisées dans différentes branches de la hiérarchie de l’explorateur.
4.1. Ressources qui peuvent être ouvertes / lancées depuis l’explorateur.
Beaucoup peuvent être utilisées dans le panneau explorateur
Ajouter des couches vecteur, raster ou maillées dans votre carte en double cliquant, glissant dans le canevas de la carte ou en cliquant sur le bouton
 Ajouter les couches sélectionnées (après avoir sélectionné les couches).
Lancer les scripts Python (incluant les traitements algorithmiques) en double cliquant ou glissant dans le canevas de la carte.
Lancer les modèles en double cliquant ou glissant dans le canevas de la carte
Extraire les symboles… des fichiers du projet QGIS en utilisant le menu contextuel
Ouvrir des fichiers avec leur application par défaut (Ouvrir <file type> avec une application externe… dans le menu contextuel). Exemples : fichiers HTML, classeurs, images, PDF, fichiers texte…
Copier les entrées
Rename and delete (multiple) layers (context menu: )
Open a file explorer window and directly select the file Show in Files
Les actions spécifiques aux ressources sont répertoriées pour les différents groupes de ressources triés sous les entrées de premier niveau énumérées ci-dessous.
4.2. Entrées de haut niveau du panneau navigateur
4.2.1. Marque-pages
Les emplacements des systèmes de fichier souvent utilisés peuvent être marqués comme marque-pages. Ceux que vous avez marqués apparaîtront ici.
En plus des opérations décrites sous Accueil, le menu contextuel vous permet de Renommer le marque-page… et Supprimer le marque-page.
4.2.2. Signets spatiaux
This is where you will find your spatial bookmarks, divided into Project Bookmarks and User Bookmarks.
Niveau |
Contextual menu |
|---|---|
Spatial Bookmarks |
New Spatial Bookmark… |
Show the Spatial Bookmark Manager |
|
Import Spatial Bookmarks… |
|
Export Spatial Bookmarks… |
|
Bookmark group (Project Bookmarks and User Bookmarks) |
New Spatial Bookmark… |
Import Spatial Bookmarks… |
|
Export Spatial Bookmarks… |
|
Individual bookmark |
Zoom to Bookmark |
Edit Spatial Bookmark… |
|
Delete Spatial Bookmark |
4.2.3. Project Home
Available once the project file has been saved, the Project home entry is a folder containing data and other contents (scripts, models, text, …) that may be used within the current project. Displayed in the Browser panel, it allows you to quickly access data and other files of the project.
It defaults to the project file folder but can be changed through the option, or by right-clicking on the Project Home item of the Browser panel and selecting Set project home…. Customizing that folder is especially useful in contexts where QGIS projects are not stored in the root folder of an organisational “project”, along with datasets.
4.2.4. Disques et système de fichiers
The next items of the Browser panel depend on the OS in use and concern the top level entries of its file system.
Il s’agit essentiellement de :
The Home folder, pointing to the current user home folder
on Unix-based machines, the root / folder
the connected drives, either local or network. Depending on the OS, they are directly listed (eg,
C:\,D:\) or through the/Volumesentry.
From the contextual menu of each of these folders or drives, you can:
rafraîchir le contenu
créer un sous-item qui serait un Répertoire, ou un jeu de données au format GeoPackage ou ESRI Shapefile
cacher le répertoire (masquer depuis le navigateur)
Set color: customize the folder icon color, aiding in rapid browser navigation of complex folder structures
enable Scanning:
 Monitor for changes: allows to manually control
whether a particular directory should be monitored and automatically updated.
This setting applies to the selected directory and all subdirectories.
This means that you can manually opt-in to monitoring of network drives
if you know there’s no issue, or manually opt-out of monitoring of large
directories which you don’t want monitored for other reasons.
By default, remote or network drives are not automatically monitored.
Monitor for changes: allows to manually control
whether a particular directory should be monitored and automatically updated.
This setting applies to the selected directory and all subdirectories.
This means that you can manually opt-in to monitoring of network drives
if you know there’s no issue, or manually opt-out of monitoring of large
directories which you don’t want monitored for other reasons.
By default, remote or network drives are not automatically monitored. Fast scan this directory
open the directory in your file manager (Open Directory…)
open the directory in a terminal window (Open in Terminal…)
inspect the Properties… or the parent Directory Properties…
4.2.5. Data type
Level and Context menu |
Types of layers |
|||
|---|---|---|---|---|
|
|
|
|
|
Fichier |
||||
Delete File <dataset name> |
|
|
||
Afficher dans les fichiers |
|
|
|
|
|
|
|
|
|
File Properties… |
|
|
|
|
Open <file type> Externally… |
|
|||
Couche |
||||
Ajouter une couche au projet |
|
|
|
|
|
|
|||
Layer Properties… |
|
|
|
|
Open with Data Source Manager… |
|
|
||
Execute SQL… |
|
|||


4.2.6. Database entries
Selon votre système d’exploitation et les pilotes installés, vous pourriez avoir accès à d’autres types de base de données dans QGIS. La liste ci-après indique les entrées du menu contextuel à chacun des niveaux de l’arborescence de la base de données
Level and Context menu |
Type de base de données |
|||||
GeoPackage ([1]) |
SpatiaLite |
PostgreSQL |
SAP HANA |
MS SQL Server |
Oracle |
|
Top menu |
||||||
Create a New Connection… to an existing database |
|
|
|
|
|
|
Créer base de données |
|
|
||||
Create Database and Layer… |
|
|||||
Save Connections… details to a file |
|
|
|
|||
Charger des connexions… |
|
|
|
|||
Connection / Database |
||||||
Rafraîchir une connexion |
|
|
|
|
||
Edit Connection… settings |
|
|
|
|
||
Duplicate Connection |
|
|
|
|
||
Remove Connection… |
|
|
|
|
|
|
Import Vector Layer… |
|
|
|
|
|
|
|
||||||
|
||||||
|
||||||
New Relationship… |
|
|||||
Supprimer <database_name> |
|
|
||||
Compact Database (VACUUM) |
|
|||||
Créer un Nouveau Schéma… |
|
|
|
|||
Créer une Nouvelle Table… |
|
|
|
|
||
Exécuter SQL… |
|
|
|
|
||
Schema |
||||||
Rafraîchir un schéma |
|
|
|
|||
|
|
|
||||
|
|
|
||||
Créer une Nouvelle Table… |
|
|
||||
Exécuter SQL… |
|
|
||||
Table / Layer |
||||||
|
|
|
||||
|
|
|||||
Exécuter SQL… |
|
|
|
|||
|
|
|
|
|
||
|
|
|
||||
|
|
|
|
|
||
|
|
|
|
|
||
|
|
|
|
|
||
|
|
|
|
|
||
|
|
|||||
Ouvrir la fenêtre Propriétés de la couche… |
|
|
|
|
|
|
Ouvrir la fenêtre Propriétés du fichier… |
|
|||||
Ouvrir avec le Gestionnaire de source de données |
|
|
||||
Fields |
||||||
Ajouter un nouveau champ… |
|
|
|
|
||
Champ |
||||||
Définir le domaine du champ |
|
|||||
Rename Field ([2]) |
|
|
|
|||
Définir un alias… |
|
|||||
Définir un commentaire… |
|
|
||||
Supprimer champ… |
|
|
|
|
||


4.2.6.1. Importing vector layers into databases using Browser panel
QGIS allows you to import vector layers directly into a database from the Browser panel.
This provides a simple way to transfer datasets into supported database
formats without using  DB Manager (see Extension DB Manager).
You can start the import in two ways:
Drag and drop a single vector layer from the Browser panel or from the Project into a database connection or schema item.
Right-click on a database connection or schema item and choose Import Vector Layer… from the context menu.
Note
When multiple layers are dragged into a database, they are imported immediately without further options. All imports run in the background, so the QGIS interface remains responsive during the process.
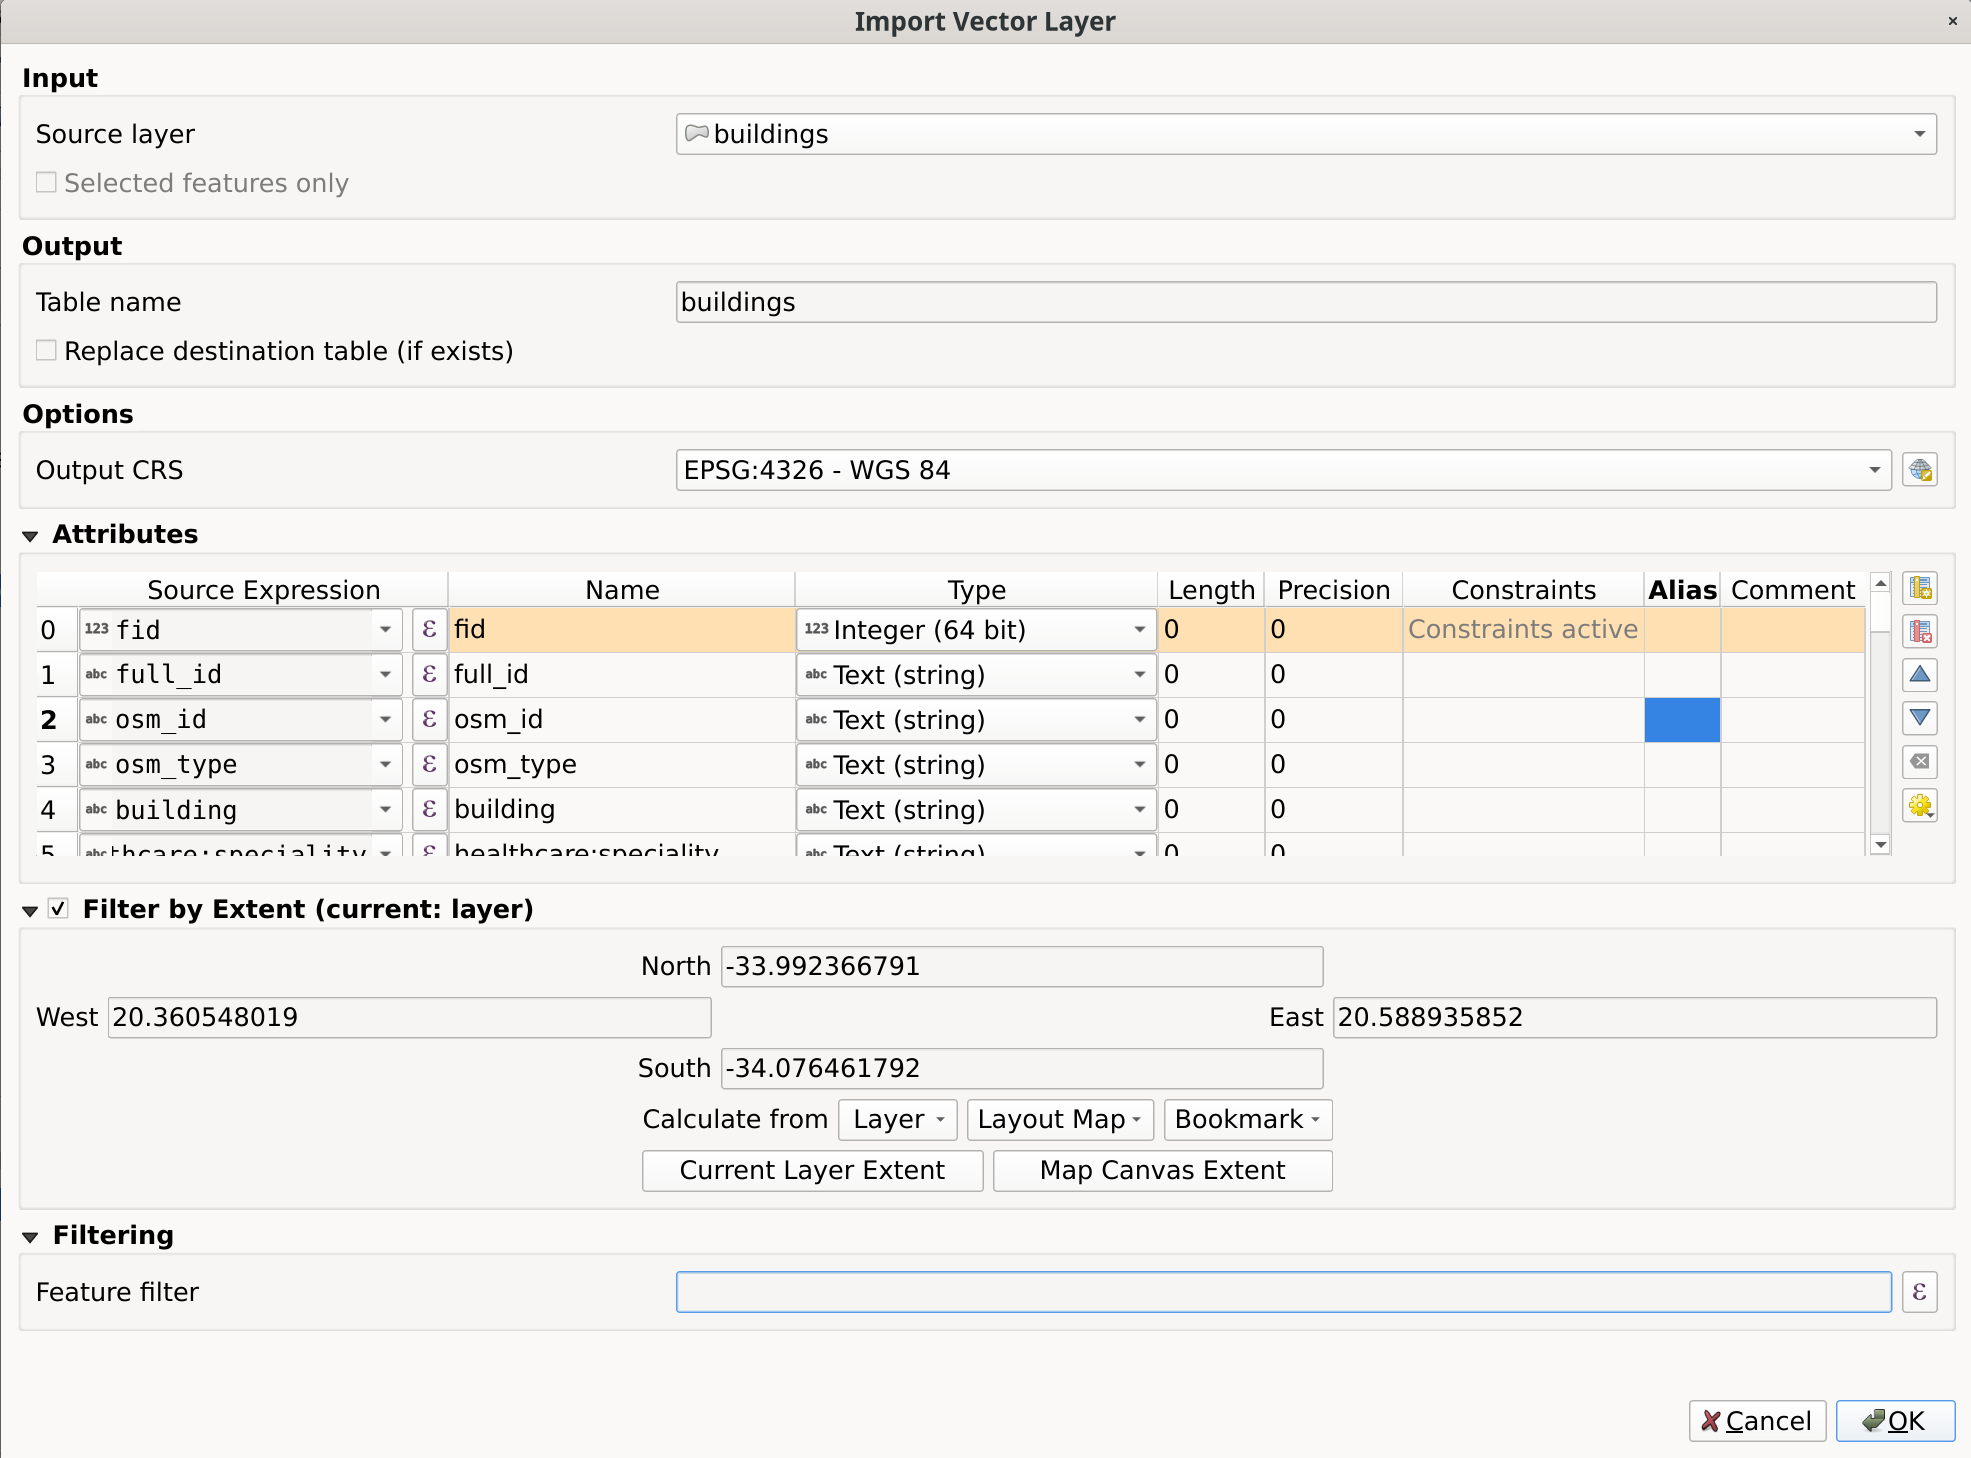
Fig. 4.3 Import Vector Layer dialog
To add a layer using Import Vector Layer… follow these steps:
Add Source layer: the layer to import, chosen from the current QGIS project. To import only selected features of the source layer use the
Selected features only option.Set the Table name: the name of the destination table in the database. By default, it is taken from the source layer name but can be modified. You can also use the
Replace destination table (if exists)
to overwrite an existing table.Define the Output CRS: the coordinate reference system of the destination table. By default, it is the CRS of the source layer, but it can be changed using the CRS selector.
Configure the Attributes:
Source expression: expression used to populate the field. By default, this corresponds to the original source field.
Name: name of the field in the destination table.
Type: field data type (integer, text, real, etc.).
Length and Precision: length and precision of the field, where applicable.
Constraints: rules to enforce on the field values (e.g. NOT NULL, UNIQUE, DEFAULT). Support depends on the destination database.
Alias: an alternate display name for the field.
Comment: a description or note attached to the field.
You can use buttons on the right side to:
 Add new field to add a new field to the destination table.
 Delete selected field to remove a field from the destination table.
 Move selected field up or
  Move selected field down to reorder fields.
 Reset all fields to clear all fields and start from scratch.
 Convert All Fields To Lowercase or Convert All Fields To Uppercase,
to change the case of all field names.
Convert All Fields To Lowercase or Convert All Fields To Uppercase,
to change the case of all field names.
Optionally, apply a spatial filter with Filter by Extent. This restricts the import to features within a defined bounding box.
Optionally, apply an attribute filter with Feature filter. This allows you to use an expression to select which features are imported.
4.2.7. Tuiles et services web
Level and Context menu |
Type de services |
||||
|---|---|---|---|---|---|
WMS / WMTS |
XYZ Tiles |
WCS |
WFS / OGC API - Features |
ArcGIS REST Servers |
|
Top menu |
|||||
Créer une Nouvelle connexion… |
|
|
|
|
|
Save Connections… details to a file |
|
|
|
|
|
Charger des connexions… |
|
|
|
|
|
Connection |
|||||
Rafraîchir la connexion |
|
|
|
|
|
Edit Connection… settings |
|
|
|
|
|
Duplicate Connection |
|
|
|
|
|
Remove Connection… |
|
|
|
|
|
Voir les infos du service dans un navigateur web |
|
||||
Table / Layer |
|||||
|
|
|
|
|
|
Ajouter une couche au projet |
|
|
|
|
|
Add Filtered Layer to Project… |
|
||||
Ouvrir la fenêtre Propriétés de la couche… |
|
|
|
|
|
Voir les infos du service dans un navigateur web |
|
||||


Level and Context menu |
Type de services |
||||
|---|---|---|---|---|---|
Tuiles vectorielles |
Scene |
Cloud |
SensorThings |
STAC |
|
Top menu |
|||||
Créer une Nouvelle connexion… |
|
|
|
|
|
Créer une Nouvelle connexion générique… |
|
||||
Créer une Nouvelle connexion au service de tuile vectorielle ArcGIS… |
|
||||
Save Connections… details to a file |
|
|
|
|
|
Charger des connexions… |
|
|
|
|
|
Connection |
|||||
Edit Connection… settings |
|
|
|
|
|
Duplicate Connection |
|
|
|
|
|
Delete Connection… |
|
|
|
|
|
Rafraîchir |
|
||||
Details… |
|
||||
Table / Layer |
|||||
|
|||||
Ajouter une couche au projet |
|
|
|
||
Ouvrir la fenêtre Propriétés de la couche… |
|
|
|
||
Rafraîchir |
|
||||
Download assets… |
|
||||
Details… |
|
||||


4.2.8. Project and supported file types
File type |
Menu contextuel |
|---|---|
QGIS Project file (.qgz, .qgs) |
|
(opens Style Manager to export symbols to XML, add to default style, or export as PNG/SVG) |
|
QGIS Layer Definition (.qlr) |
|
Processing Model (.model3) |
|
Print Composer Template (.qpt) |
|
Python script (.py) |
|